Getting started on my Cyber Security Home Lab
Taking a first look at my Cyber Home Lab. The network layout and the general overview of what I want to accomplish with this lab.
PORTFOLIO POSTS
Duncan
4/3/20253 min read
Introduction to the Cyber Lab
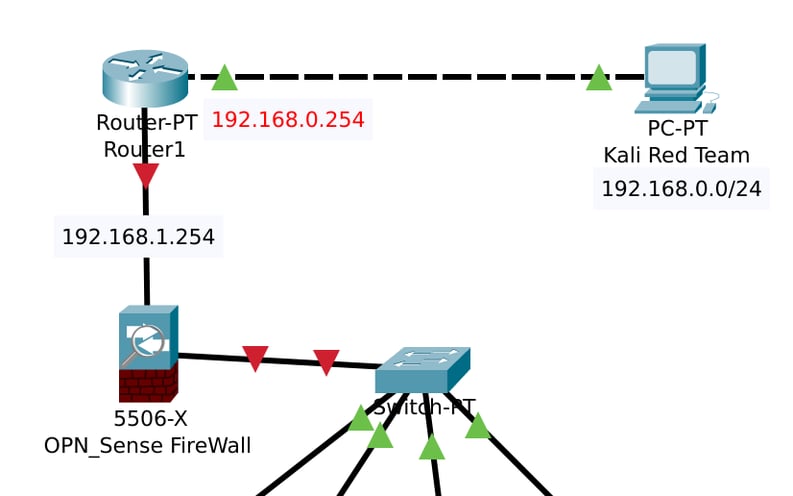
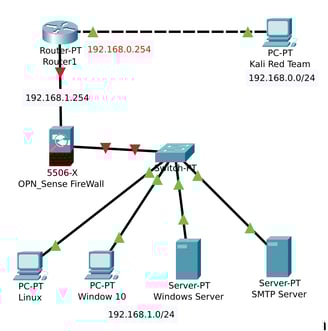
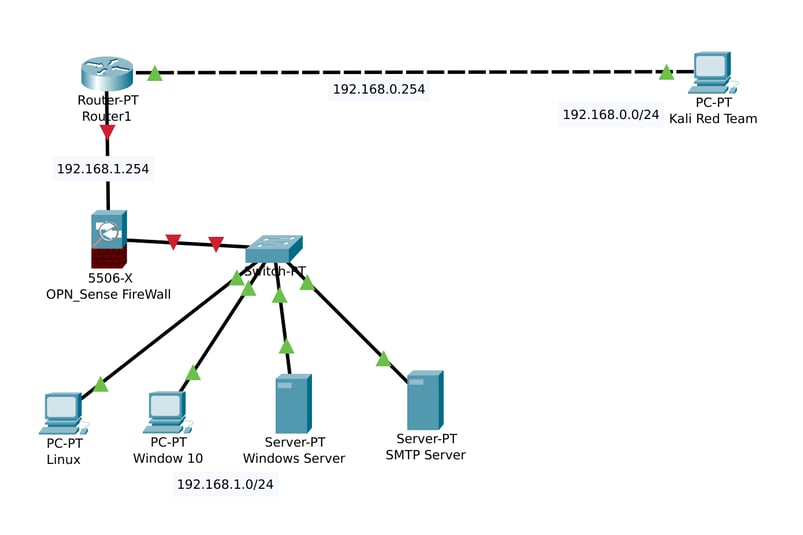
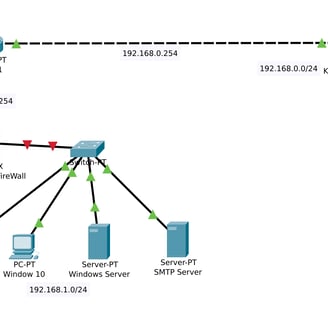
I've officially started my journey into building my own home lab! The first step? Sketching out my network layout using Cisco Packet Tracer.
Packet Tracer has quickly become one of my favorite tools while studying network engineering. It’s an incredibly powerful simulator that mirrors real-world networking scenarios, making it the perfect environment for testing configurations and troubleshooting issues before I encounter them in class. By practicing in Packet Tracer, I can identify sticking points early and either work through them myself or come prepared with specific questions for my tutor.

Network Components
Right now, my network has four main components:
Linux Ubuntu v24.04.2 – This will run my Blue Team SIEM program, Wazuh.
SMTP Server – To handle email communication within the network.
Windows Server – This will include Windows Active Directory for managing users and authentication.
Windows 10 OS – To simulate a typical end-user workstation.
This setup should help me recreate a small-scale organization’s network environment, complete with some of the tools they might use daily. Of course, this is just a starting point, and I plan to expand on it as my skills grow and I get access to more resources.
Excited for Wazuh and the Firewall
The two components I’m most eager to dive into are the firewall and Wazuh SIEM. After watching a few YouTube deep dives on Wazuh, I’m excited to get hands-on experience with it. Wazuh is an open-source SIEM solution that also includes Intrusion Detection (IDS) and Intrusion Prevention (IPS), making it a powerful tool for monitoring network security.
I’ve noticed that SIEM experience is frequently listed in cybersecurity job descriptions, so learning how to use Wazuh effectively is a priority for me. The same goes for getting comfortable with Windows Active Directory and other Windows Server tools—both are critical skills in the industry. Within the context of Windows applications, I have taken an interest in some of their fundamental courses, and will possibly consider taking some of them, to both gain the experience, as well as earn some certificates to stick on my resume.
Next Steps
Now that my initial layout is in place, the next challenge is getting the firewall up and running. Setting up OPNSense in my virtual environment will be an interesting challenge, and I can’t wait to experiment with different security policies and traffic rules.
This is just the beginning of my home lab journey, and I’m excited to see where it takes me!
Designing My Network
In my initial setup, I focused on the basics:
Connecting devices with the right cables.
Setting up the router’s IP interfaces and securing it with console passwords.
Assigning IP addresses to all the host devices within their respective subnet ranges.
With these foundational configurations in place, all devices can successfully communicate with one another—at least until I introduce the firewall.
Home Lab and Virtualization Considerations
Packet Tracer has been an excellent tool for mapping out how my home lab will function. My goal is to create a fully operational network where devices can communicate effectively with each other and connect to the outside world.
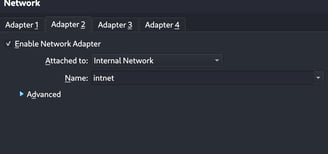
One key difference in my actual setup is the firewall. While I included a Cisco firewall in Packet Tracer, I plan to use OPNSense in my real-world home lab. Since my setup is entirely virtualized, I’ve had to make a few adjustments:
No physical switch—everything is connected through an Internal Network in VirtualBox, allowing multiple virtual machines to function as if they were physically wired together.
My personal PC will act as the "Gateway" to the ISP, providing an external connection to the virtual network.
Portfolio
Showcasing skills in cyber security and design.
Blog
© 2025. All rights reserved.